Entry 16- Mountain of corpses and another body
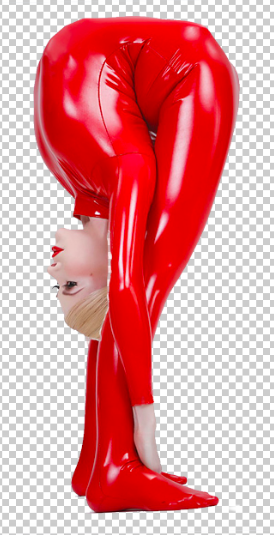
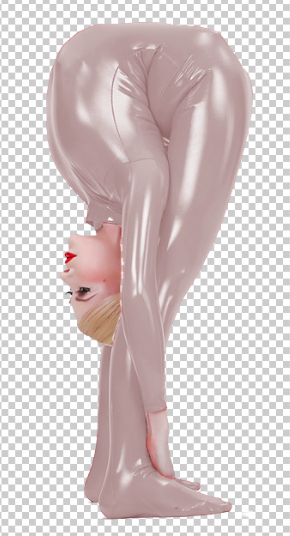
This lesson, I decided to work further on the detail of my mountain of corpses. Since I only had 2 corpses at that time, I decided to add another one so that the mountain of corpses could be built with a "variety" of corpses later on. Like I always do, I got an image of a girl acrobat from Google in a large size, and then downloaded it. The girl that I worked with had a significant amount of blush on her face, which made it hard for me to use the clone tool on. In the end, I achieved making her face "blank" like my other blonde girl by using a variety of different sized cloning brush and trying to blend them in all together. After that, I duplicated the layer of the girl, added a masking layer, and then masked out everything but her clothes. I then proceeded to colourize the colour of her clothes to match her skin, and then by using the clone tool, I blended the edges of the clothes with her skin.


After all that, I finally decided to work on my mountain of corpses. Since I'm already done with the assets that I need in order to make my corpses, I just needed to stack them and position them. At first, I positioned the 3 corpses that I needed by stacking them on top of another, rotating them and also re-portioning them to make it seem natural. This process was harder than it sounded as the corpses did not suit the position I put them in a lot of times. After that, I duplicated the 3 layers of the 3 bodies, and repeated the same step, except this time, I flipped it horizontally so that the body and the position seemed different. I repeated the same step, but this time instead of flipping it, I rotated it to 90 degrees and colourised the boy into a different skin colour. I then repeated this step again, but positioned it differently, rotated it differently, and colourised the blonde girl. I then repeated this step again, but positioned it differently, rotated it differently, and colourised the other girl. After that, I selected all the bodies that I made, duplicated it, and rotated it, re-portioned it, and then positioned it. I repeated this step a few more times 'till I got a mountain of corpses. I then added all the layers into a folder I named "corpses" so that the layers were more organised. After all that, I figured that I did not like the size of the mountain of corpses, so I selected all the corpses layer, duplicated it, and then merged it into one so that I could resize it.

That's all that I've done for this lesson.
Since I've prepared all my 3 corpses that I'll be using my photoshop, I'd like to explain the meaning behind some of the stuff that I did for the corpse. First of all, the reason why I changed the clothes colour to a skin colour and blend it in with the skin was to make them appear naked. Now, there's a reason behind this. I wanted to make them appear naked so that it showed their "inner-self". The reason why I wanted the corpses to represent their "inner-self" will be explained thoroughly in my last blog entry, but overall, I wanted to portray the concept of vulnerability, worthlessness, origin, same level and shown to the open eye.

Comments
Post a Comment